


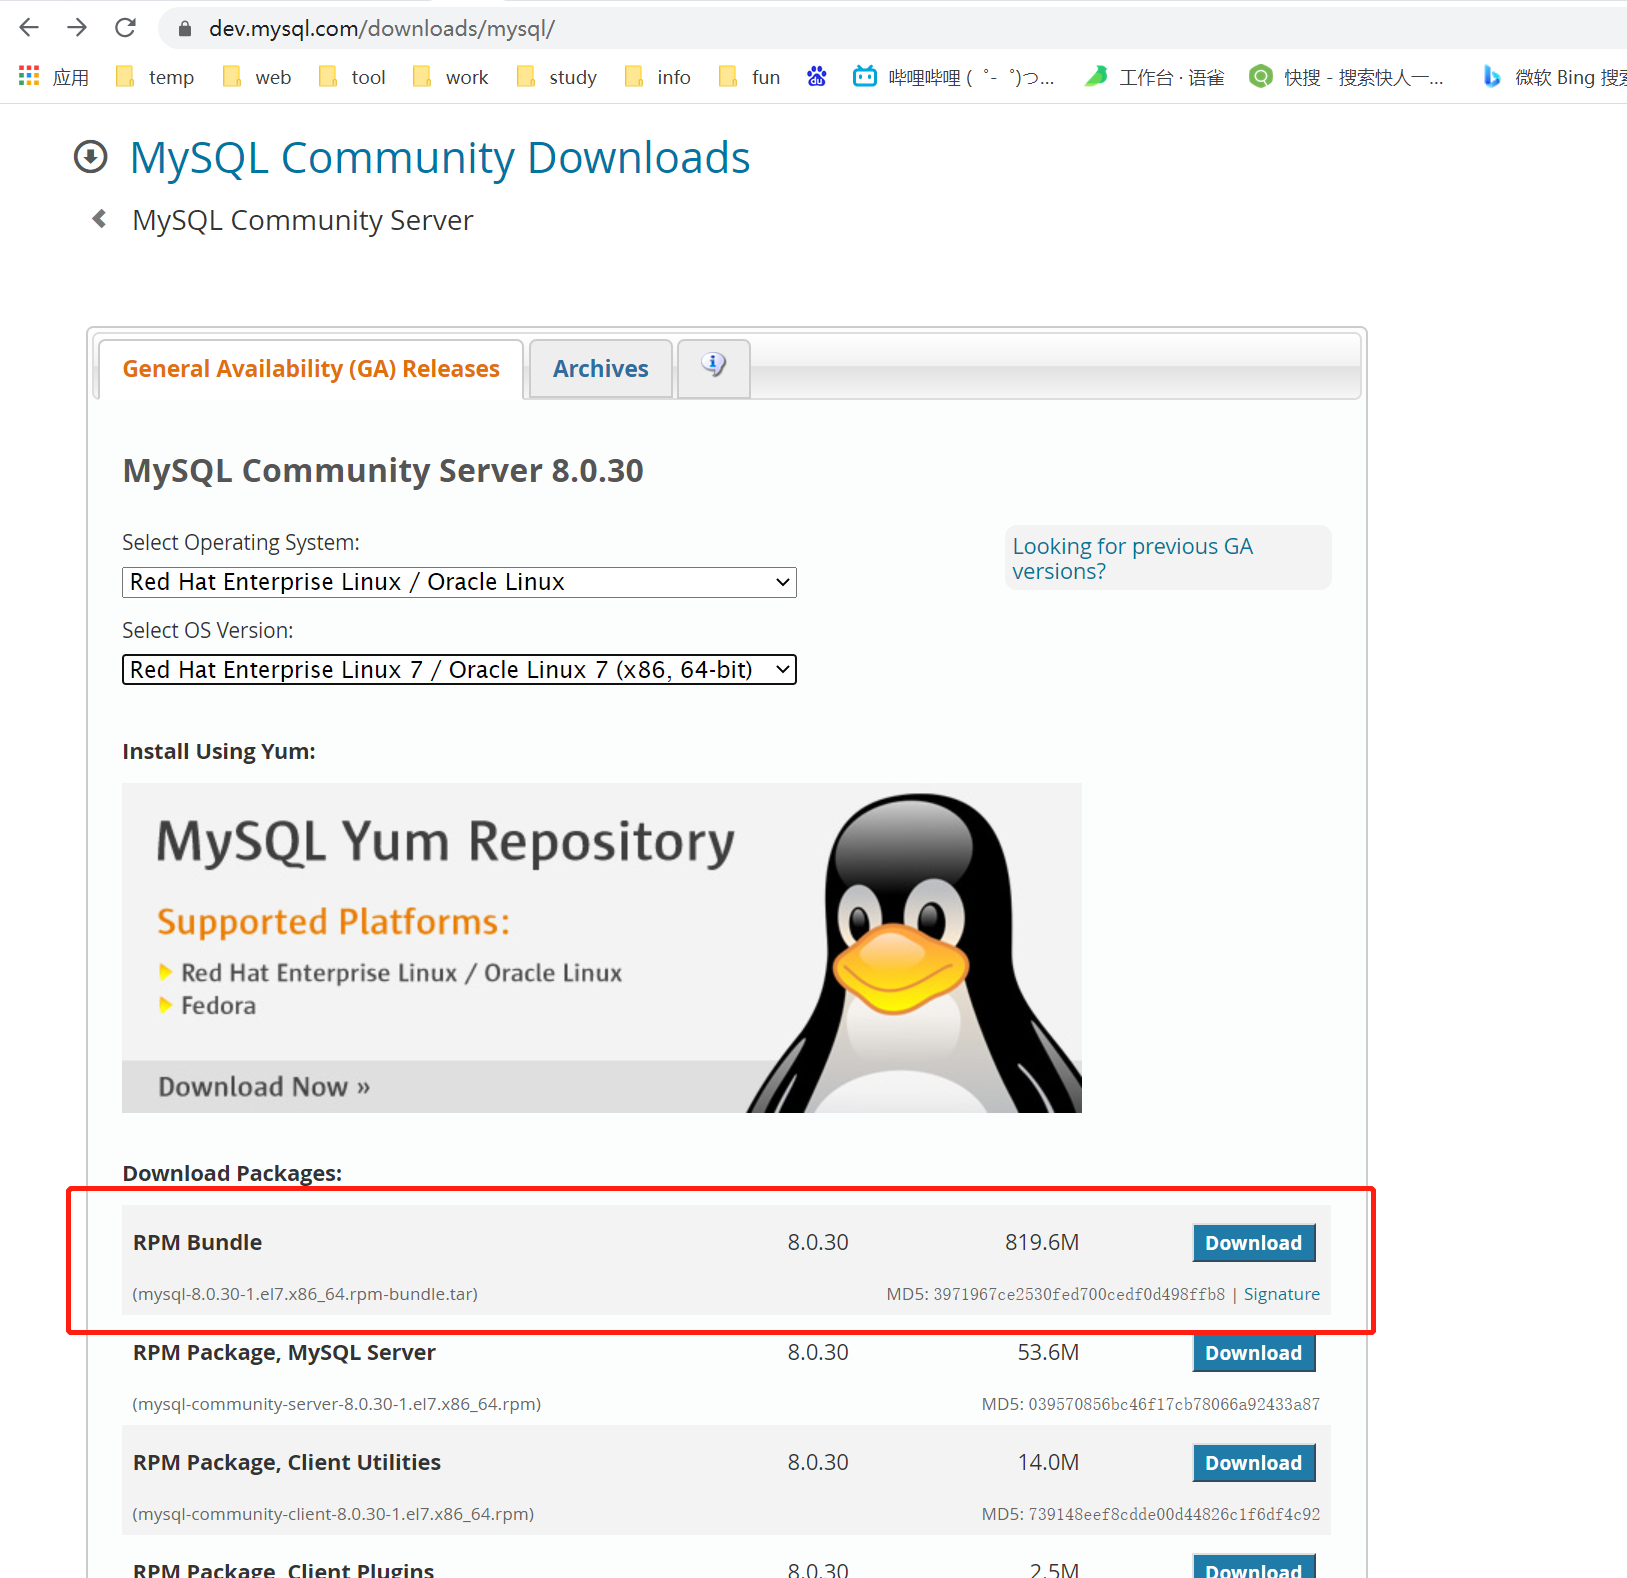
下载地址:https://dev.mysql.com/downloads/mysql/
根据系统选择bundle包下载
tar -xf mysql-8.0.18-1.el7.x86_64.rpm-bundle.tar
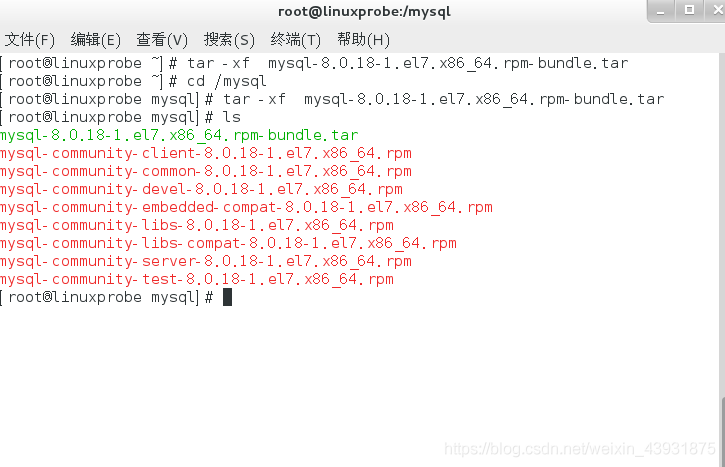
3. 安装mysql 3.1 按照依赖关系依次安装rpm包 依赖关系依次为common→libs→client→serverrpm -ivh mysql-community-common-5.7.22-1.el7.x86_64.rpm rpm -ivh mysql-community-libs-5.7.22-1.el7.x86_64.rpm rpm -ivh mysql-community-client-5.7.22-1.el7.x86_64.rpm rpm -ivh mysql-community-server-5.7.22-1.el7.x86_64.rpm # ivh中, i-install安装;v-verbose进度条;h-hash哈希校验3.2 libaio.so包缺失处理
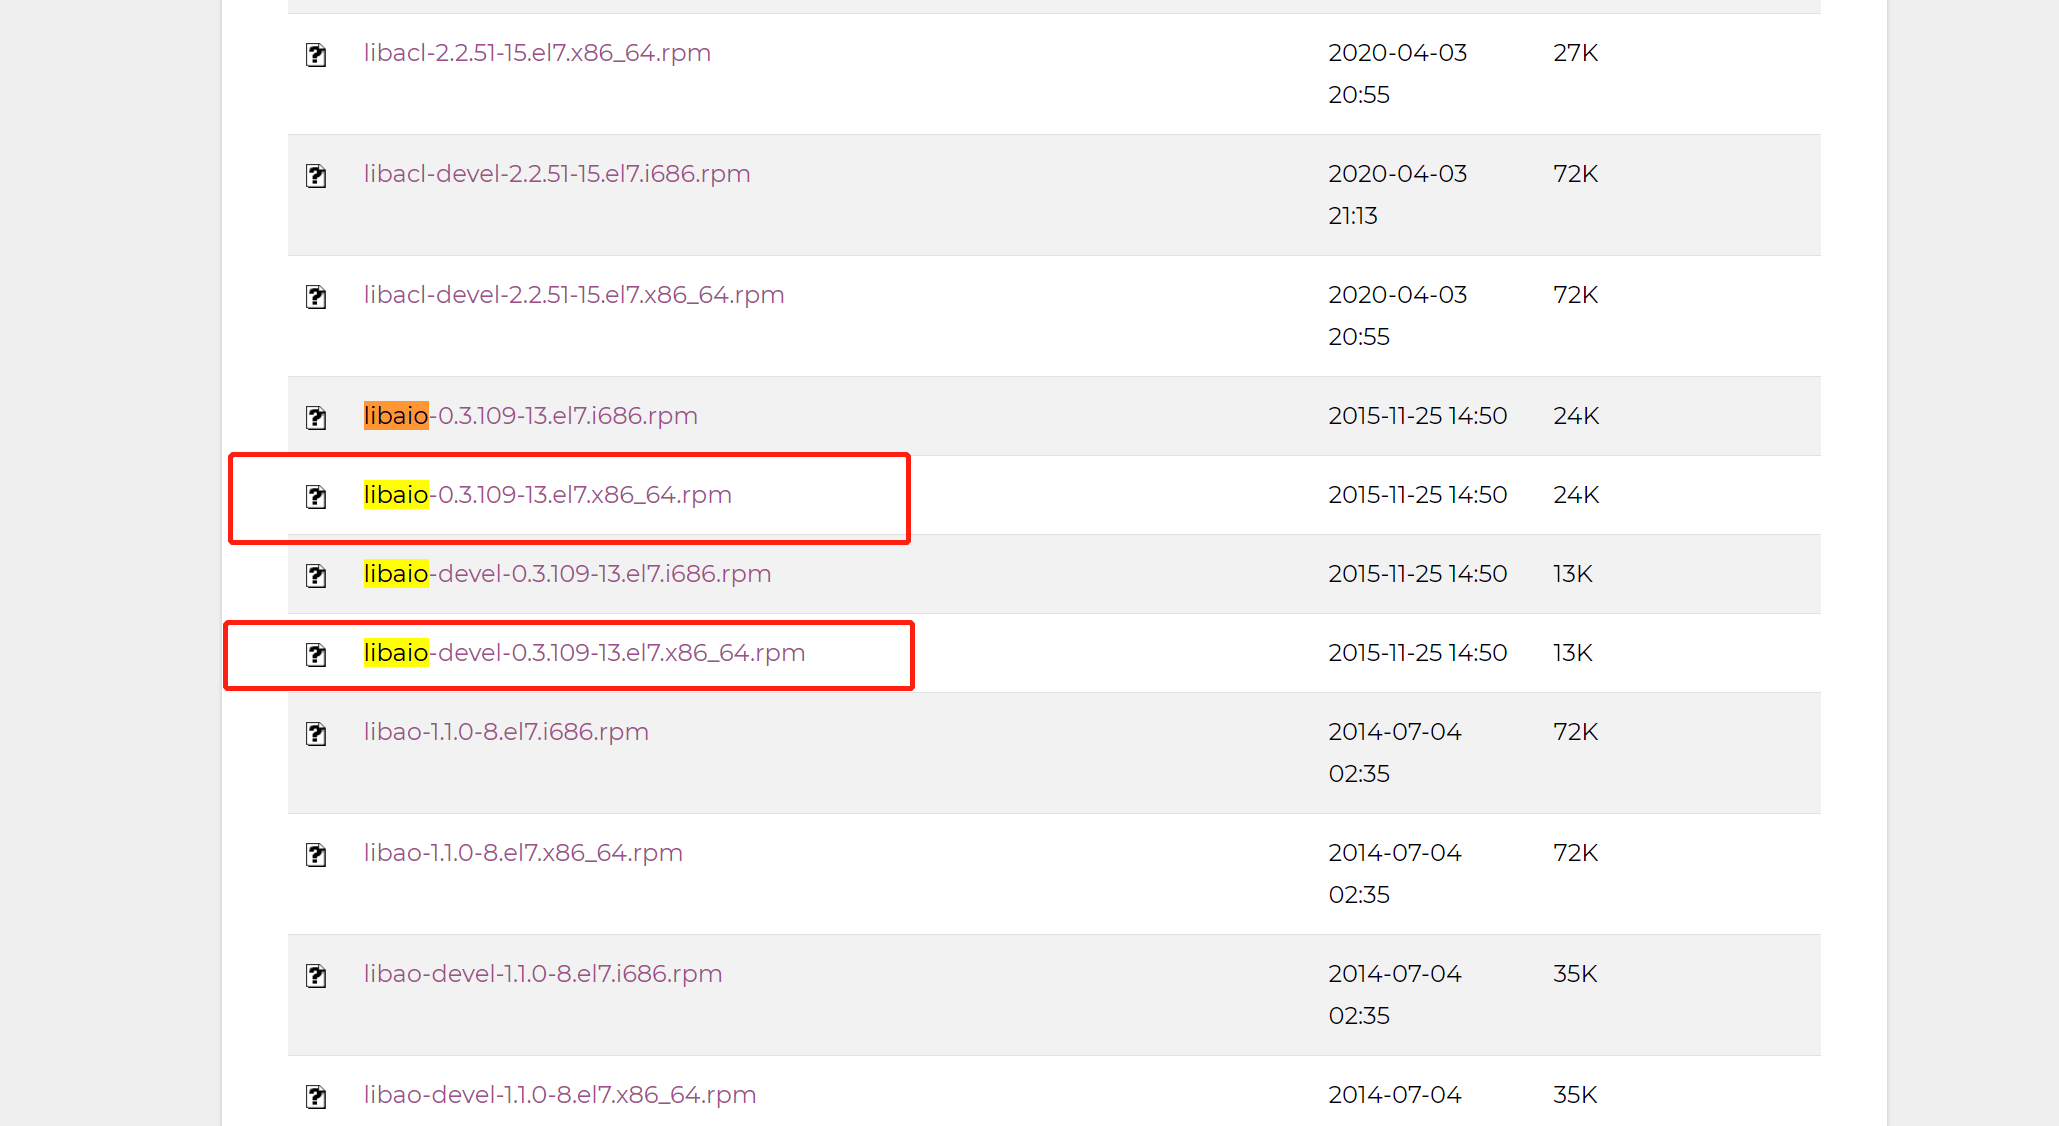
安装过程中出现异常,提示缺少libaio包
[root@AppServer1 soft]# rpm -ivh mysql-community-server-5.7.19-1.el7.x86_64.rpm

warning: mysql-community-server-5.7.19-1.el7.x86_64.rpm: Header V3 DSA/SHA1 Signature, key ID 5072e1f5: NOKEY

error: Failed dependencies:

        libaio.so.1()(64bit) is needed by mysql-community-server-5.7.19-1.el7.x86_64

        libaio.so.1(LIBAIO_0.1)(64bit) is needed by mysql-community-server-5.7.19-1.el7.x86_64

        libaio.so.1(LIBAIO_0.4)(64bit) is needed by mysql-community-server-5.7.19-1.el7.x86_64
到Centos官网下载后rpm安装: http://mirror.centos.org/centos/7/os/x86_64/Packages/
数据库目录:/var/lib/mysql/
命令配置:/usr/share/mysql (mysql.server命令及配置文件)
相关命令:/usr/bin (mysqladmin mysqldump等命令)
启动脚本:/etc/rc.d/init.d/ (启动脚本文件mysql的目录)
系统配置:/etc/my.conf
systemctl status mysqld
systemctl restart mysqld
3.5 密码设置
1. vim /etc/my.cnf
2. 在最后加上: skip-grant-tables
3. 重启mysql服务: systemctl restart mysqld
4. mysql -u root-p  不需要输入密码直接enter即可
5. 设置root账号的密码:
        设置密码:update mysql.user set authentication_string=password('123456') where user='root' ;
        刷新:FLUSH PRIVILEGES;
6. 退出mysql:将之前加入的跳过密码验证删掉
             命令:vim  /etc/my.cnf
             把skip-grant-tables去掉
7. 重新登录数据库
        执行命令出现不能操作情况:show databases;
        修改密码即可:alter user 'root'@'localhost' identified by 'Root123456xxx';
8. 外部不能连接问题
        use mysql  ;
        GRANT ALL PRIVILEGES ON *.* TO 'root'@'%' IDENTIFIED BY 'Root123456xxx' WITH GRANT OPTION;
        flush privileges;刷新
[
](https://blog.csdn.net/xixiyuguang/article/details/106658129)


